Saturday 29 August 2009
Monday 22 June 2009

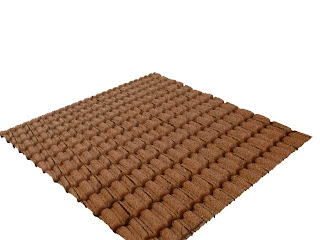
Displacement mapping within 3DS Max can rapidly increase poly counts because the more detail you require then the more polygons you will need. Applying displacement maps throughout your scenes will result in extremely high poly counts but V ray has an answer to that problem. The V ray Displacement Mod allows you to create highly detailed displacement maps without the need for huge poly counts. This tutorial will cover the basics of how to use this modifier so you can create highly detailed models.

Start by creating a plane with as little segments as you like and apply a texture to it.
 Apply the Vray Displacement Mod which can be found right near the bottom of the modifier list.
 Under parameters select 2D Mapping and then choose your displacement image in the empty Texmap box. I usually create a black and white version of the original texture in Photoshop in order to create a displacement map texture.
Adjust the Amount value to increase or decrease the amount of displacement you desire.
 The resolution parameter is the amount of detail you would like the displacement map. I chose a value of 2048 so that it has a fairly high amount of detail.
Once you have done that then hit render to see the results. The displacement mod is also very good for creating realistic looking grass, the more you increase the amount then the longer the grass. Enjoy!
Subscribe to:
Posts (Atom)